Lookin' for something?
Hey, Look! We're on

Entries in cooks (45)

Thursday
May192011

Queenie Cooks: Strawberry-Rhubarb Compote

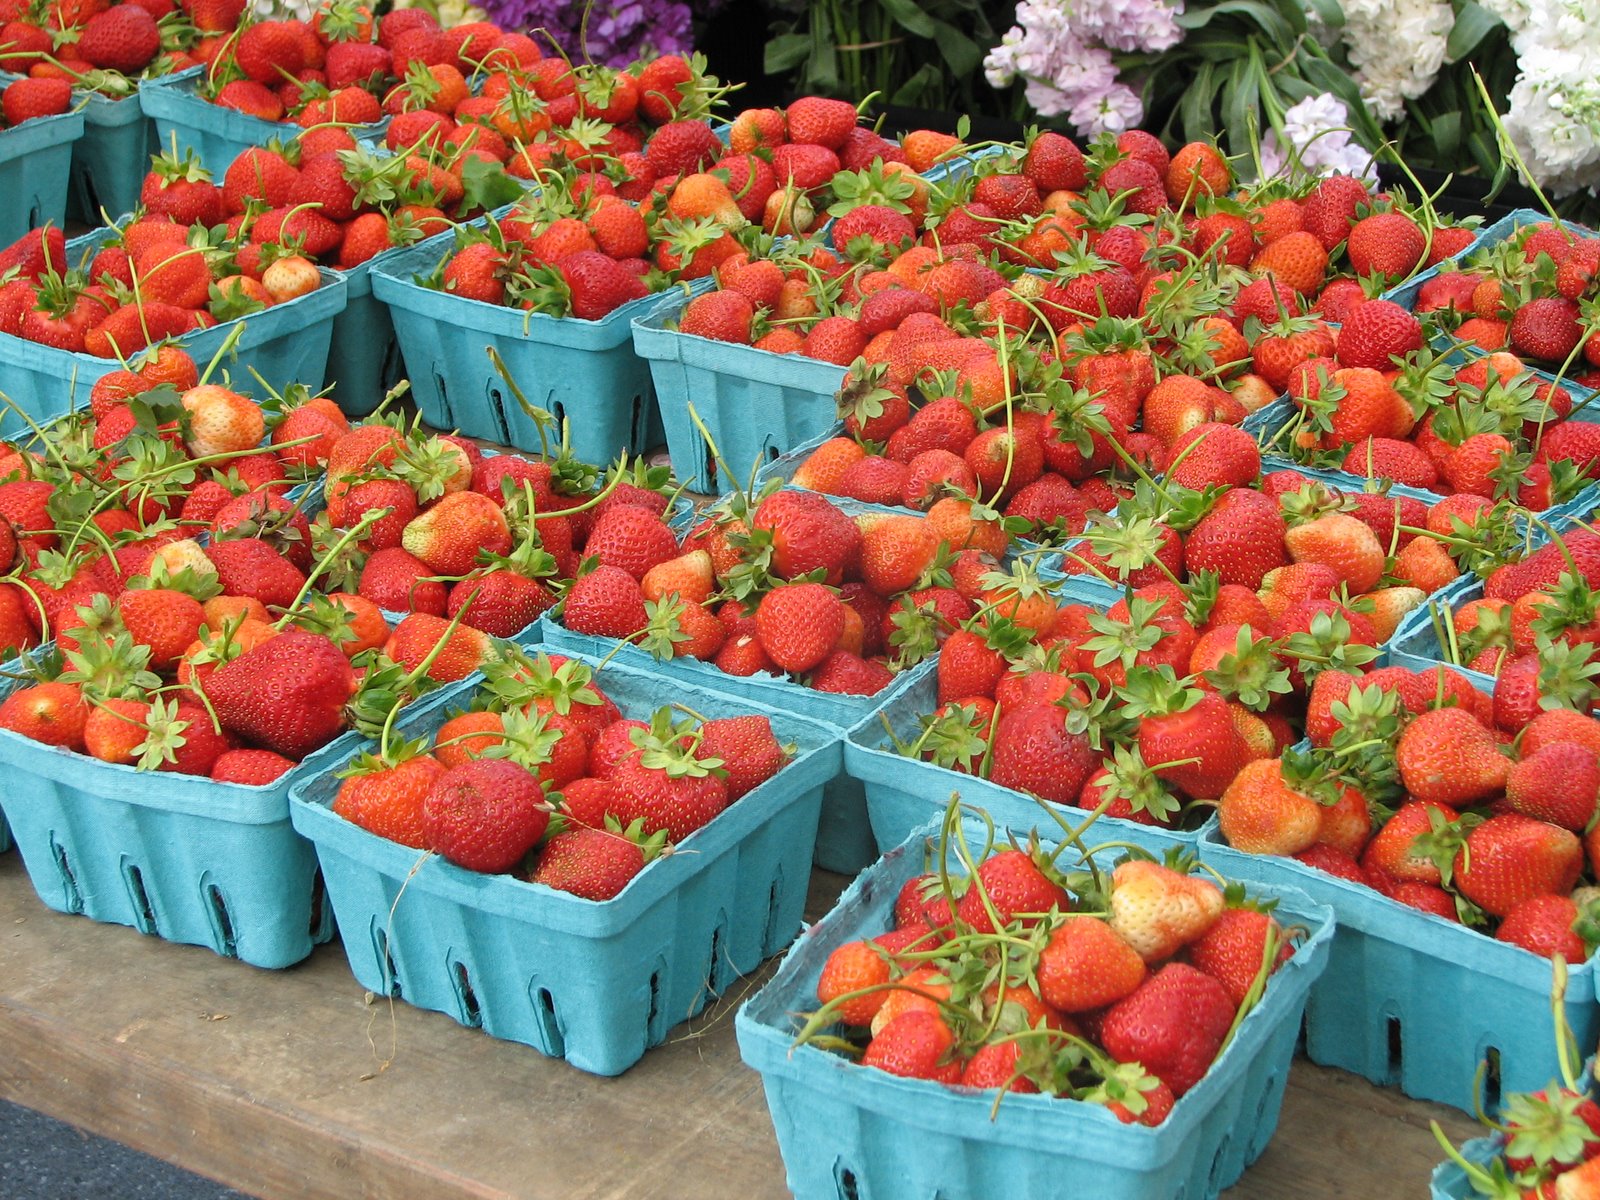
Kiddos, I am seriously psyched. I heard today (not through the grapevine, but via the lovely and amazing Lucy's Greenmarket Report) that strawberries have made their debut at the New York City Greenmarkets! This is especially exciting news, as I was expecting strawberries to be a bit late this year, thanks to the cold, erratic weather we've been having around these parts.

But, no. The strawberries defied expectations and have arrived ahead of Memorial Day, and I am seriously psyched to get my hands on some this weekend.

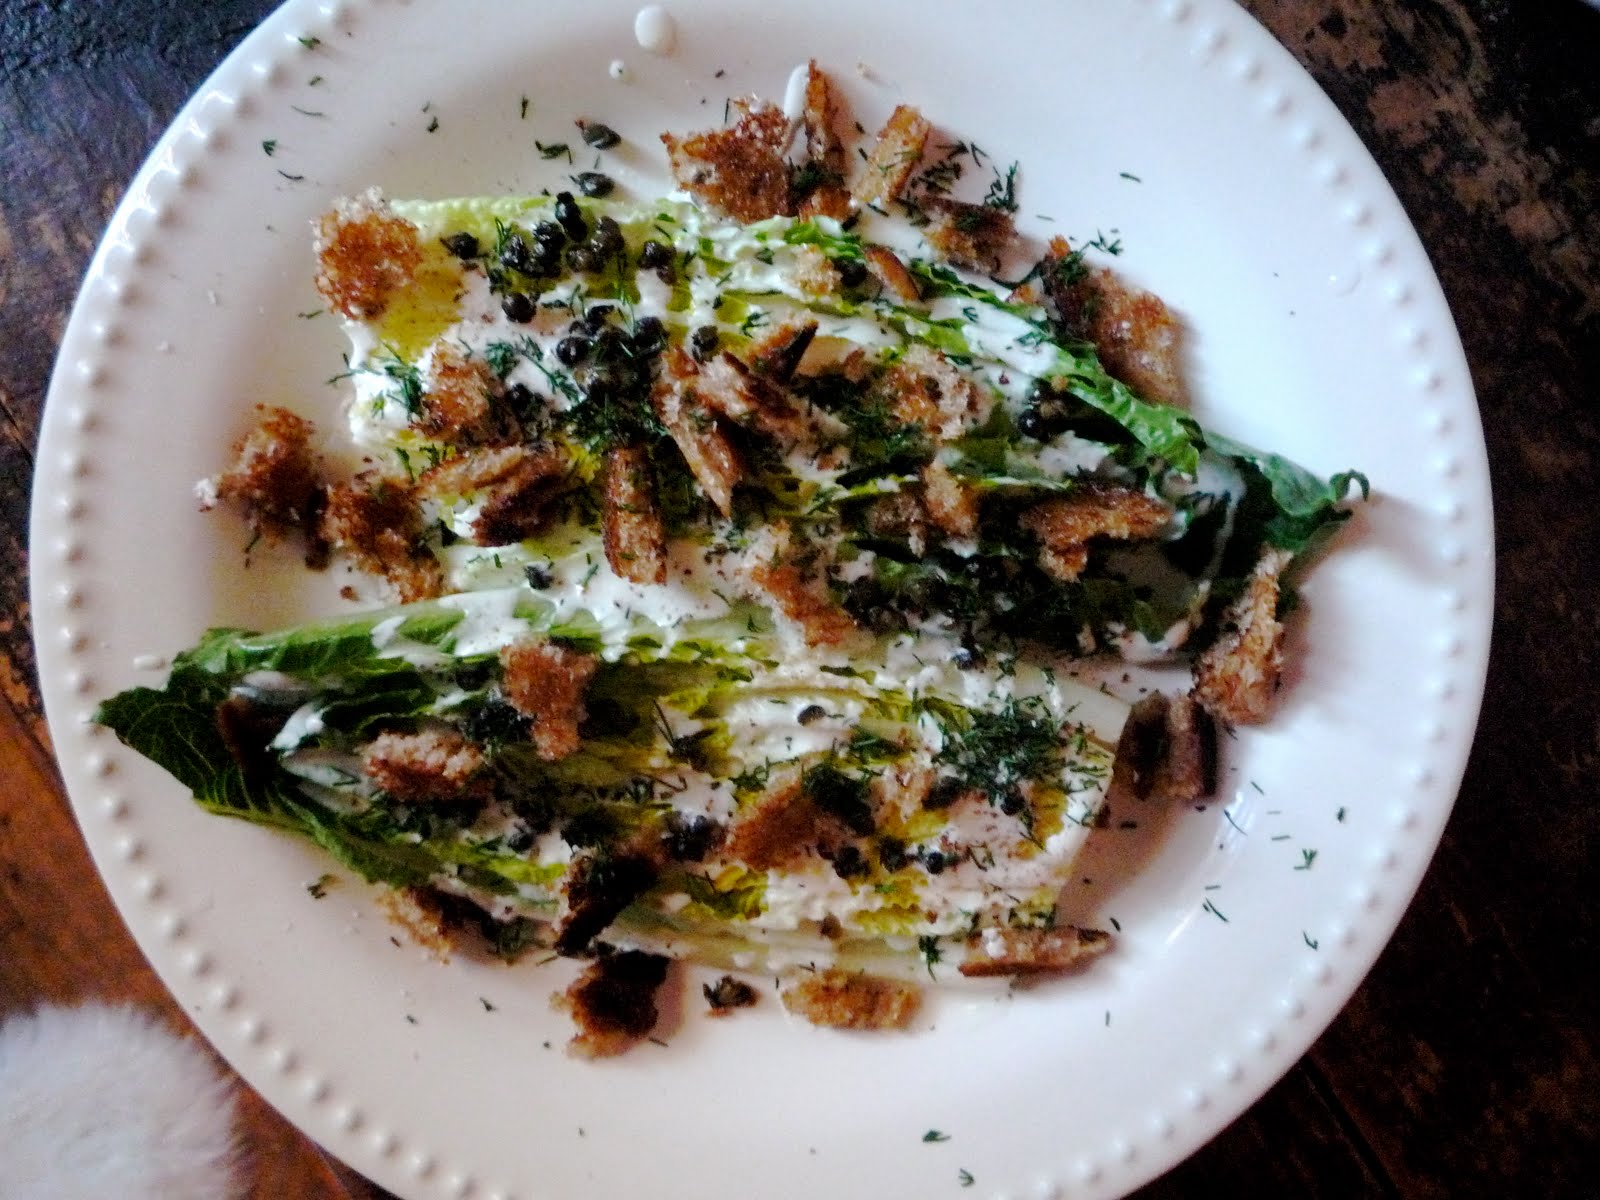
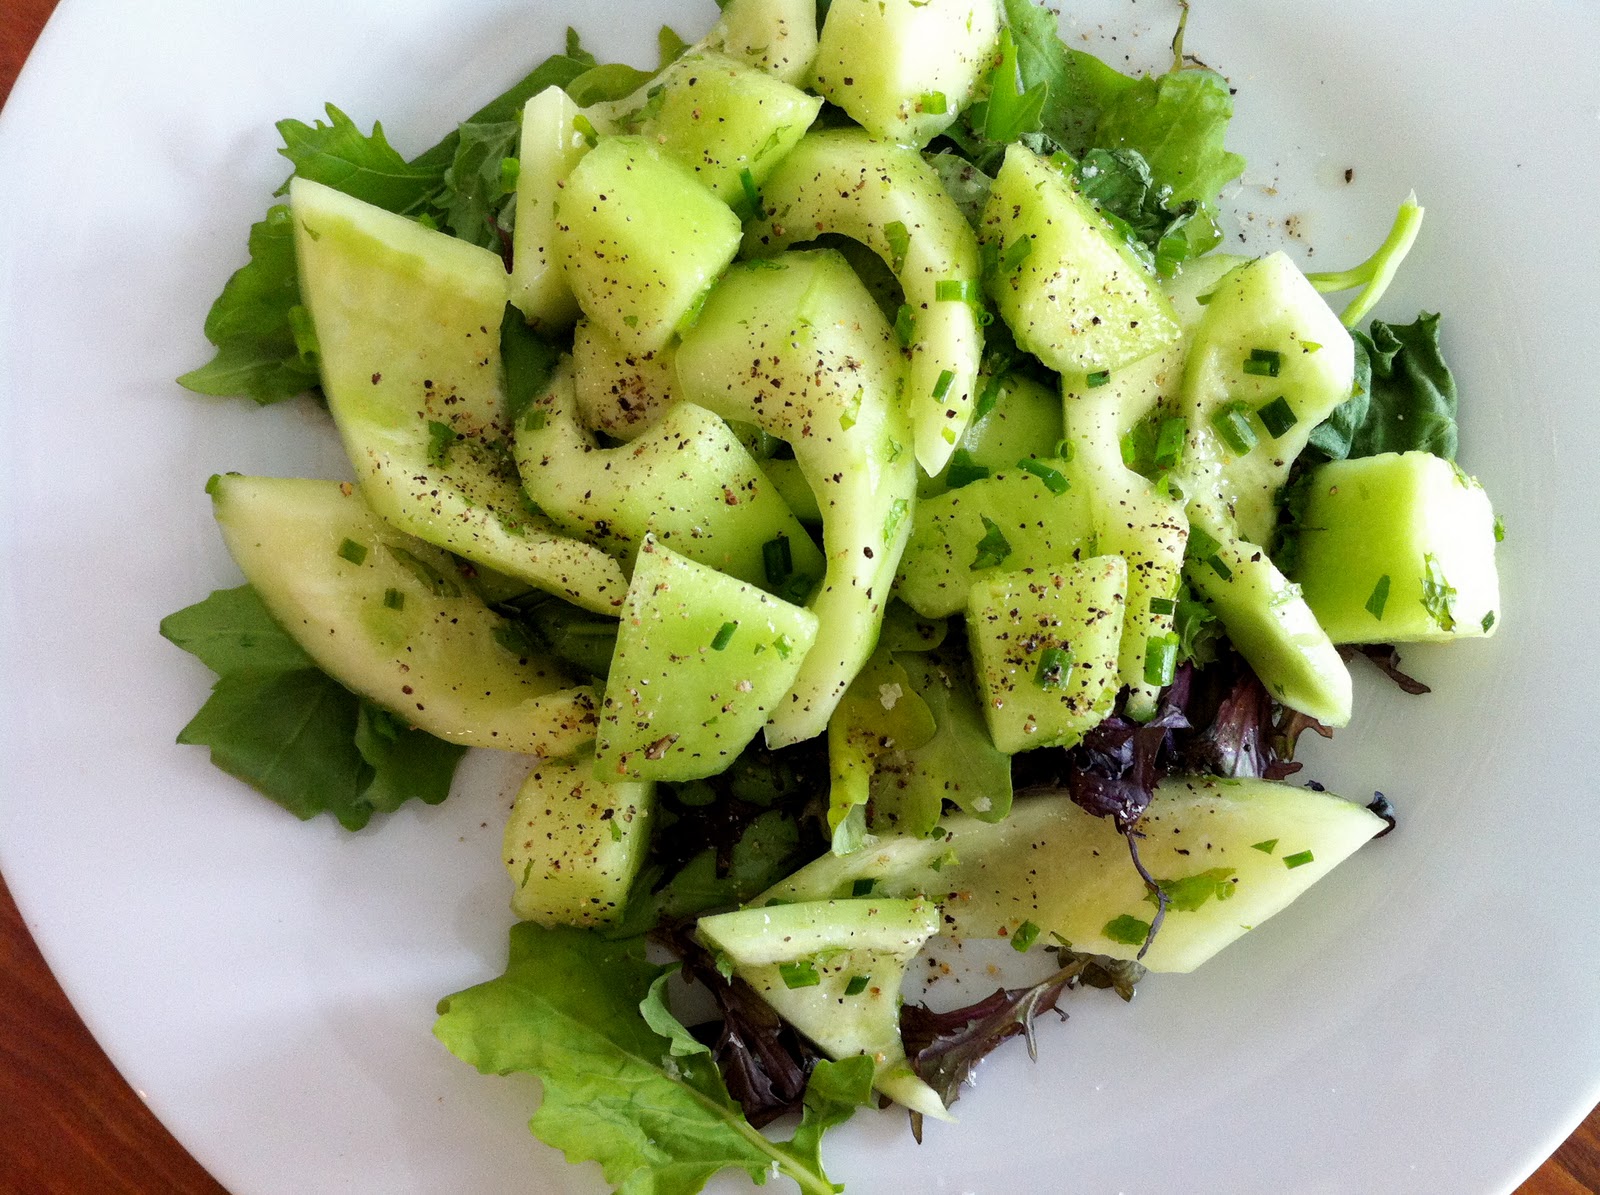
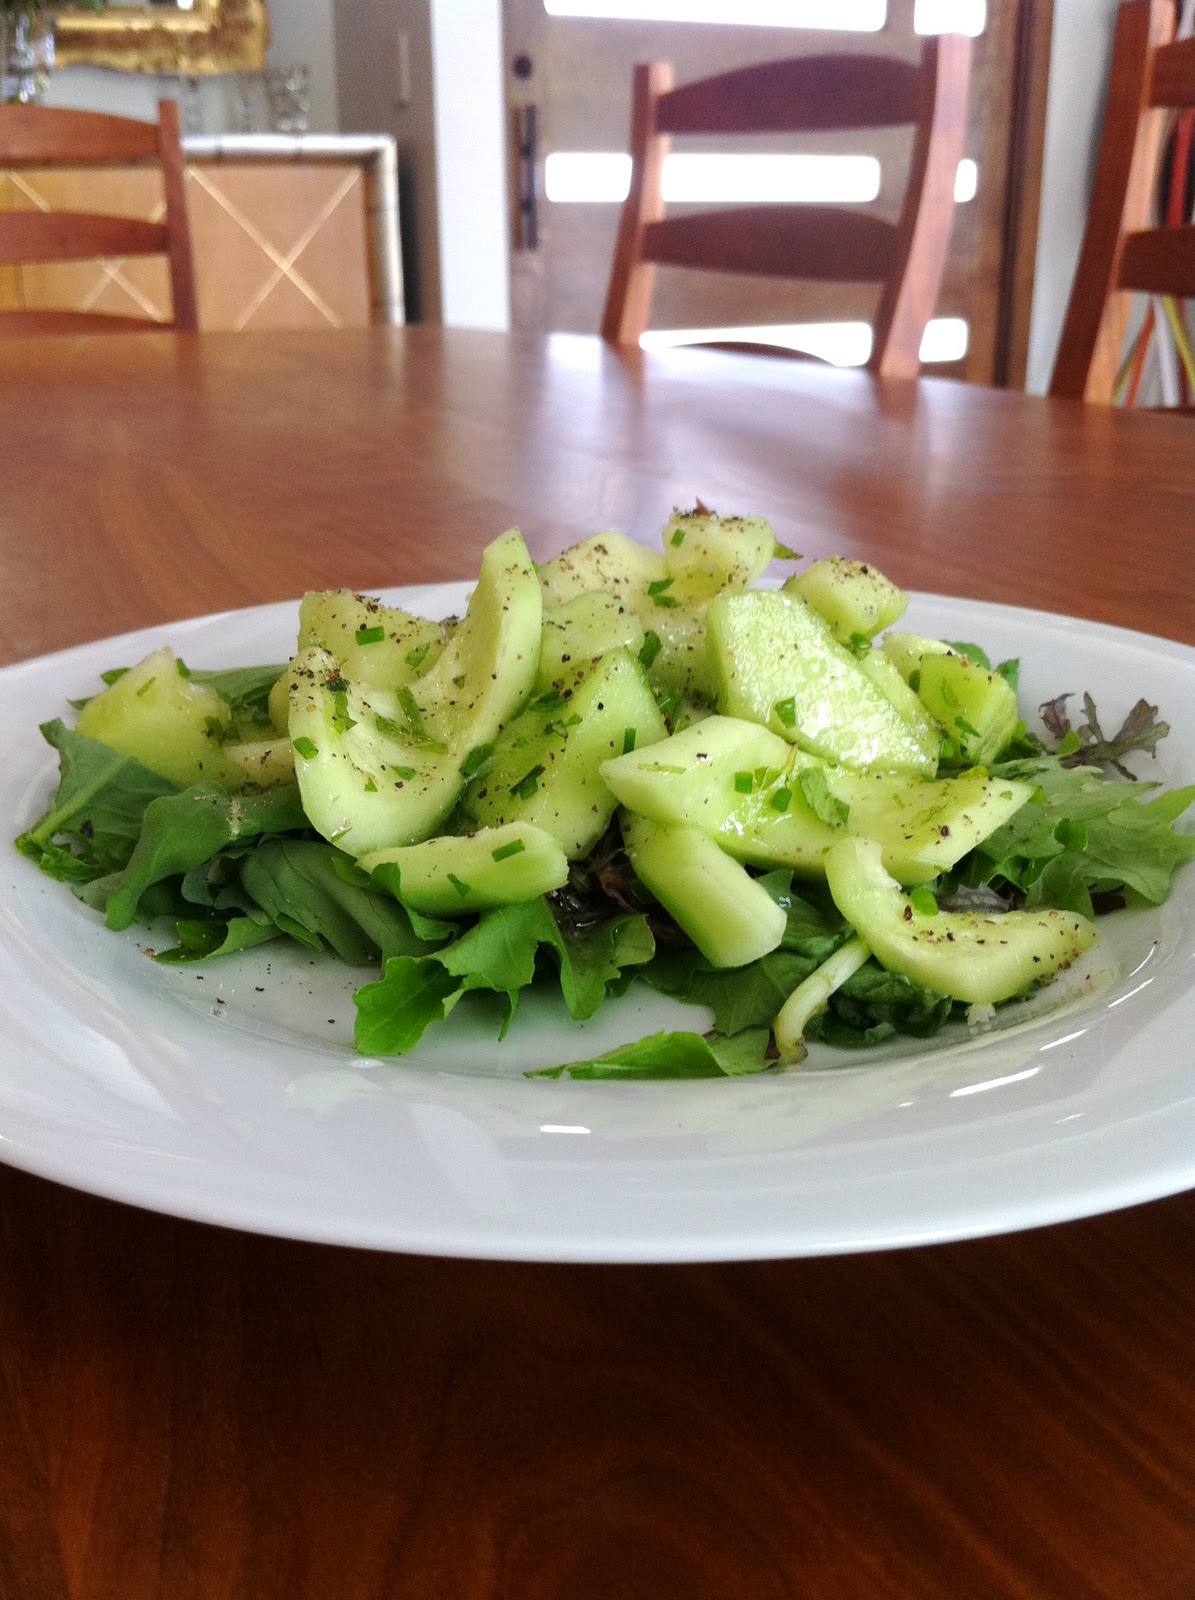
See, strawberries and I go back. In fifth grade, when my elementary school held its annual Parents' Night, each set of parents was asked to identify their child's desk by reading the lists of clues left behind for them, which included a "Favorite Foods" section. Everyone else picked pizza or spaghetti - my parents knew right away that their daughter's desk was the one which read "strawberries and cucumbers."

So, yeah. Strawberries, man. When the first batch comes in, I typically gorge myself on a pint, then wipe the juice from my chin before making a batch of this strawberry-rhubarb compote. It's especially delicious on vanilla ice cream with a drizzle of syrupy, very old balsamic, or with Greek yogurt and a bit of honey.

Make sure to taste the compote before you cool and store it. I tend to like it a bit tart, but you might want something on the sweeter side, especially if you have little ones. We don't want to put them off the strawberries. I like to think I have a spiritual heir to the fruit-loving throne out there somewhere, you know?

Strawberry-Rhubarb Compote

3-4 stalks rhubarb, leaves trimmed, strings removed, cut crosswise into 1/2 inch pieces
1/4 - 1/2 cup sugar (depending on taste)
1 quart strawberries, hulled and sliced length-wise into 1/4 inch pieces

In a medium saucepan set over medium heat, cook the rhubarb down till just softened, but still holding its shape. Stir in the sugar and heat till it dissolves in the rhubarb's juice, then stir in the strawberries.

Cook just until bubbling, then remove from heat. Once the mixture has cooled somewhat, spoon into a clean mason jar and refrigerate until you're ready to eat! It should last about two or three weeks in the fridge.

You can also eat it warm, if you so desire.

Makes approximately 3/4 quart of compote.

Thursday
May052011

Queenie Cooks: Early Spring Jam Tart

Spring is here! Sort of.

It may be gray and rainy outside, and we may still be weeks away from strawberry season, but I'm starting to get antsy for fruit. Berries, stone fruit, apples - you name it, I'm craving it. But there's not a whole lot out there for a local eater to enjoy. Here in New York, we don't even see ripe rhubarb till mid-May.

What to do, then, when you're in the mood for a fruity dessert? Why, I'm so glad you asked! My go-to solution is one I learned from the lovely Deb of Smitten Kitchen - make a jam tart.

Jam - good jam, at least - is summer kept year-round in a jar. Opening a jar of Bonne Maman's strawberry preserves always makes me smile and think of warm June afternoons, and spreading it on pastry? Makes me smile even bigger. You should definitely consider kicking it up a notch and combining different flavors to fill your tart - maybe peach and strawberry? Or apricot and raspberry? Go nuts - you know it can't possibly be bad.

Even better,if you're a canner, you probably have some amazing, homemade preserves hanging around, just begging to be baked into a tart. Summer's almost here again - you need to clear that space on the shelves for this year's crop, right? So what are you waiting for?

Early Spring Jam Tart
Adapted from Smitten Kitchen

1 1/2 cups flour
1/2 cup stone-ground cornmeal or polenta
2 tsp. baking powder
1/2 tsp. salt
9 tbs. unsalted butter, at room temperature
1/2 cup granulated sugar
1 egg, whole
1 egg, separated
1/8 teaspoon vanilla extract
1 1/3 cups jam or marmalade
1 tbs. coarse-crystal or granulated sugar

In a small bowl, whisk together the flour, cornmeal, baking powder and salt. In a food processor, pulse the butter and 1/2 cup sugar together until smooth. Add the egg and egg yolk along with the vanilla and pulse until combined. With the processor on, gradually add the flour mixture through the feed tube and mix until the dough just comes together.

Transfer about one-third of the dough to a lightly floured counter and shape it into a log about 2 inches in diameter. Wrap it in plastic wrap and refrigerate it until needed. If the shelves in your fridge are wire, place the log on a plate before putting in the fridge.

Transfer the remaining dough to a buttered 9-inch tart pan with a removable bottom. Using your hands or the flat bottom of a measuring cup, press the dough evenly into the bottom. Press the dough up the sides to the rim of the pan and set the tart pan on a baking sheet. Refrigerate the dough-lined pan until firm, at least one hour.

Preheat the oven to 375°F. Spread the jam or marmalade evenly over the dough in the pan. Cut the chilled dough into very thin discs with a sharp paring knife. Arrange them slightly overlapped in concentric circles over the jam to form a top crust. (I used a square tart pan, so I did mine in rows, and let the jam peek out a bit.) Using a fork, beat the remaining egg white with a teaspoon of water until frothy; brush evenly over the tart lid and then sprinkle with1 tbs. of coarse sugar. Bake until the top crust is golden brown, about 20-25 minutes. Let cool completely before serving.

Keeps very well, wrapped tightly, at room temperature.

Serves 6-8.

Thursday
Apr212011

Queenie Cooks: Cauliflower Puree with Garlic and Walnut Oil

Reader, I know what you're thinking: ANOTHER cauliflower recipe? What, is this woman being paid by some sort of cruciferous vegetable consortium to force-feed us tree-like foods until we keel over?

The answer sadly, is no. My income is in no way supplemented by some bizarre veggie subsidy. The plethora of cauliflower is due simply to my stubborn belief that tomatoes don't belong in the Northeast until July, unless they arrive in a can. I try to be as seasonal and local as I can (hence my recent raptures for ramps), and cauliflower helps me do that.

That said, this recipe is no sad capitulation to a stubbornly reticent spring season. It is, in fact, really freaking good. It's almost - dare I say it - better than mashed potatoes. (Gasp!) I think it has something to do with the sharp flavor of the cauliflower, which plays beautifully off of the cream and butter, and the slight amount of garlic, which is somehow less offensive to me here than it is in mashed potatoes.

The trick to bringing out all that flavor is making sure your cooking water is well-seasoned - either use plenty of salt, or substitute vegetable or chicken stock, depending on your vegetarian status. Well, that and the butter. And the cream.

There's another reason I love this recipe: I get to use my secret weapon du jour to make it. That's right, folks - I am in lust with my immersion blender. The thing comes in handy more often than I can say. Want to puree a soup? Do it right in the pot. Want to whip a bit of cream? This thing has a whisk attachment. Want to make all your friends jealous of your culinary wizardry? Get an immersion blender. (For less than $40. Really.)

Serve the puree with, well, anything. It goes marvelously with roasted or braised chicken, underneath chickpea stew, or, frankly, on its own as a sort of naughty-feeling-but-not-naughty-at-all bowl of comfort.

Cauliflower Puree with Garlic and Walnut Oil

1 large head cauliflower, about two pounds, cut into evenly-sized florets
3 garlic cloves, peeled and whole
2 tbs. butter
2 tbs. heavy cream
2 tsp. walnut oil
2 tbs. finely chopped parsley
Kosher salt and freshly ground black pepper

Fill a pot large enough to hold the cauliflower. Fill halfway with water and bring to a boil. Add a generous amount of salt (about a palmful, if you have small palms like mine) and the cauliflower and garlic. Cover and simmer until the cauliflower is very tender, about 7-10 minutes.

Drain the cauliflower and place in a narrow, deep bowl. (I actually use a 2-quart saucepan.) Add the butter and cream, along with a big pinch of salt and several turns of the peppermill. Using a stick blender, puree the mixture until smooth. (If you're looking for silky, pass the puree through a fine mesh strainer.)

Divide the puree between the plates, then sprinkle with a touch more salt and pepper and the parsley. Drizzle a bit of the walnut oil over the top. Serve immediately.

The puree will keep, tightly covered in the fridge, for a few days. Reheat gently over low heat.

Serves 3-4 as a side.

Thursday
Apr142011

Kitchen Basics, Lesson 5, Cooking Oils

randy mayor


Have you noticed how the cooking oil aisle in the grocery store has seemingly multiplied in size in the past few years? What was once an exclusive soiree of corn, canola and olive has turned into a full-fledged party. Newbies include avocado, safflower, sesame, walnut and more. Pretty cool, huh? Now, only if we knew what to do with all of em'...


To start, all oils have something called a "smoke point." This is the temperature at which the oil will break down and lose its ability to be effective. A high smoke point allows for more heat than a lower smoke point would. This (and flavor) are essentially what makes oils differ from each other. 


Here is a quick guide of oils and their respective smoke points to help navigate you through all the many choices:


Avocado Oil, 520 F
Butter, 302 F
Clarified Butter, 374-482 F
Canola Oil, 468 F
Coconut Oil, 351 F
Corn Oil, 457 F
Grape Seed Oil, 399 F
Lard, 280-394 F
Mustard Oil, 489 F
E.V. Olive Oil, 374 F
Palm Oil, 446 F
Peanut Oil, 448 F
Safflower Oil, 509 F
Sesame Oil (Unrefined), 351 F
Soybean Oil, 466 F
Sunflower Oil, 475 F
Walnut Oil, 399 F


Remember, when deep-frying or pan-frying it is important to use a cooking oil with a high smoke point such as Canola. Flavorful oils such as walnut and olive oil, which have a slightly lower smoke point, are best used in dressings, very low-heat cooking and even as substitute for the fat in baked goods. 


Good Luck, and Happy Cooking!


Thursday
Apr072011

Queenie Cooks: Romaine Hearts with Lemon, Crème Fraiche & Fried Capers

You know how sometimes you just crave the familiar? I've been feeling that way of late. I've had a crazy month, and the next two weeks promise to be just as (wonderful and) nutty. When the world sweeps me up in its madness like this, I find myself dreaming of simple comforts: reading in bed on a Friday night, taking a bracing walk through Central Park in the cold - and comfort food, of course.

Sometimes comfort food means a big bowl of pasta, and sometimes it means a burger from the local greasy spoon. And sometimes - especially when I'm feeling a bit off-balance - it means salad. See, I love salad. I don't understand people who turn their noses up at leafy greens of any kind. In my house, salad is practically a religion, and certainly its own food group. I. Love. Salad.

This romaine salad, based on one I first enjoyed at the adorable Anella (in Greenpoint, Brooklyn), has become one of my very favorites. It's only been in my repertoire for a little over a year, but it's already earned a permanent place of honor. That's partly because of its deceptive simplicity, and partly because it makes use of three of my favorite ingredients: capers, fresh croutons and crème fraiche. (Which, let's face it, is really just schmancy sour cream, and I love sour cream, too.)

While this is an incredibly easy dish to prepare, there are a few things to keep in mind. First, make sure your salad plates and your romaine are both chilled to a delightful crisp. There are times when you want the lettuce in a salad to be closer to room temperature; this is not one of them. You want firm leaves and a nice temperature contrast with the capers and croutons.

Second, make the fresh croutons. Do not be tempted to use croutons from a package, no matter how high-falutin'. The buttered toast flavor of the fresh ones is key to the success of this salad. If you want to swoon, you simply must toast a slice of bread in butter. There's nothing else to be done.

Romaine Hearts with Lemon, Crème Fraiche and Fried Capers
Adapted from Anella

1/4 cup plus one tablespoon canola oil, divided
2 tbs. capers, rinsed, drained and dried for 30 minutes on paper towels
1 tbs. butter
1 slice bread (I used whole wheat, but you can use whatever you like.)
3 tbs. crème fraiche
1 1/2 tsp. fresh lemon juice
1 romaine heart, halved lengthwise
1 tbs. dill, finely chopped
1 tbs. white onion, minced
Kosher salt and freshly ground black pepper

Fry the capers:
In a small skillet or saucepan set over medium-high heat, heat 1/4 cup of the canola oil until very hot. (A drop of water flicked onto the surface should crackle and evaporate immediately.) Add the capers and fry until they turn dark brown and smell nutty. Turn off the heat and, using a slotted spoon, remove the capers to a plate covered with paper towels. Set aside.

Make the buttery croutons:
In a medium skillet set over medium-high heat, heat the remaining canola oil with the butter. Once the butter has melted and is slightly foamy, add the slice of bread and turn the heat down slightly. Toast until dark brown on one side, then flip and toast the other side. Remove to a cutting board and slice into 1/4 or 1/2 inch squares. Set aside.

Make the dressing:
In a small bowl, whisk together the crème fraiche and lemon juice. The dressing should have a thick but drizzle-able consistency, like homemade ranch dressing. Season lightly with salt and pepper.

Assemble the salad:
Place the romaine heart halves side by side on a chilled plate. Drizzle generously with the dressing (Use it all; don't be afraid.), then sprinkle with the dill. Follow with the onion, then the croutons, and finally the capers. Finish with a bit of salt and pepper. Serve immediately.

Serves one, generously, or two, if you're really, really good at sharing.

Thursday
Mar312011

Kitchen Basics, Lesson 4, Standard Breading Procedure

photo by Barbara Bonisolli
Or, SBP as it's known to most cooks, is one of the fundamental lessons in the kitchen. As a young culinary student myself, I was shocked when so much classroom time was devoted to mastering the subject. Shouldn't it be common-sense? A little egg… a little crumb… some heat and voila, done!? Turns out, there's a little more to it than that.

There are three basic components in SBP. They are flour, eggs, and breadcrumbs - in that order.

First is the flour, which should always be all-purpose. Cooks will sometimes season this with salt, pepper or spices for extra flavor. That is optional.  

Next, are the eggs. Traditionally, this is a mixture of cream and eggs. Cream will make for a heavier crust. If you prefer not to use cream, you may substitute milk, or even water. The crust will be a little bit lighter as a result if you do. Whatever you decide, make sure to always beat the eggs until well-blended. 

Breadcrumbs are the last treatment. You may use store-bought, or make your own by grinding bread in a food processor. I like to use Panko, which is a flaky, Japanese breadcrumb.

Your station should like like this:

Notice how the raw ingredient is to the far left, followed by the flour, eggs, breadcrumbs, and finally the finished tray on the right. It is important to set this whole station up before you begin breading..

Organizing and arranging all of your ingredients before you begin cooking is known as mise en place. A french term which roughly translates to having "everything in place."

After you're all set up, you may begin to bread. Designate your right hand to be your "dry" hand, and your left hand to be your "wet" hand.

With your dry (right) hand, pick up your ingredient to be breaded and toss it around in the flour. Make sure it is entirely coated. Remove it from the flour and shake and pat it to remove any excess flour.

Drop it into the egg wash. Use your wet (left) hand to lift it out of the eggs and let the excess drain off. Then drop it into the breadcrumbs.

Using your dry (right) hand, pack on the breadcrumbs until they are evenly distributed. Then, lift the ingredient out and shake off any excess. 

Place the breaded item onto a prepared tray, and repeat this process until everything has been breaded.  


Feel free to experiment! Add buttermilk to the eggs for a tangy and moist breading. Or grind day-old brioche, sourdough, whole wheat, even pita bread for homemade breadcrumbs. The options are endless, and always delicious.


illustration patterns by sonia delaunay

Thursday
Mar242011

Queenie Cooks: Watermelon, Cucumber and Pepper Salad


Hello, my lovelies! Since last we spoke, I've been gallivanting here and there around balmy Austin, Texas. I headed down for South by Southwest and made the most of all the music, food and, well, food the city has to offer. Toward the end of my good times binge, my friend (and hostess) Louisa and I spent a day sitting by her beautiful pool. It was 85 and sunny, and we decided a salad would be just the thing for lunch.

Louisa knows well my proclivity for all things cucumber and had purchased three gorgeous ones ahead of my visit. She'd also picked up a perfectly ripe honeydew melon, thinking it'd be just the thing to combine with the cucumber in Deborah Madison's cucumber and melon salad. By the time we got around to actually making it, though, we were practically out of limes, a key ingredient, and there wasn't a scallion to be found in the house - another important element.

While Louisa worked diligently on copy edits for her latest novel, I got to work in the kitchen. I chopped and seeded and peeled and arranged, substituting champagne vinegar for lime juice and spiking the dressing with a bit of zest. In went chives in lieu of scallions, along with a shower of mint (a faithful element at last).


All in all, I think our version is more suited to my tastes. I tend to like a hit of citrus here, a pinch of it there; the lime level in this adaptation is much more me than the original. Come summertime, this would be absolutely incredible with some fresh local watermelon, or even a thin-skinned tiger melon. Yes, indeedy.

Cucumber and Melon Salad
Adapted from Vegetarian Cooking For Everyone by Deborah Madison

2 cucumbers, peeled, cut in half lengthwise and seeded
1/2 honeydew melon, cut into 3/4-inch chunks and chilled
2 tbs. mint, finely chopped
2 tbs. chives, finely chopped
Zest and juice of one lime
3 tbs. champagne vinegar
1/4 cup neutral oil, such as grapeseed or canola
Kosher salt and freshly ground black pepper
2 cups arugula

Slice the cucumber halves crosswise on the bias into 3/4-inch wide slices. Toss with the honeydew, mint and chives in a small bowl. Set aside.

Mix together the lime juice and zest, vinegar and oil. Add a healthy pinch of salt and whisk to combine into a dressing.

Divide the arugula in half and pile each half onto one plate. Top with the cucumber mixture, then spoon the dressing over the top. Finish with lots of ground pepper and some more salt. Serve immediately.

Serves two.

Thursday
Mar172011

Kitchen Basics, No. 3: Washing and Storing Spring Produce


Ernst Benary - Album Benary

Can you believe it? I'm almost too superstitious to say it, but I will. Spring has sprung in New York. At least that's what I assume (err…hope) all those mid-afternoon rainstorms are about. Right?

Just thinking about all the warm, sunny and light-filled days that lie ahead gets me so giddy. I can't help but be uber-excited... and hungry. It's safe to say that spring delivers my favorite foods.  Asparagus? Strawberries? Yes, Please!

As the days draw close, it's seems appropriate to share with you some tips and techniques on handling these precious ingredients with the care and tenderness they deserve. Spring is a time of renewal, and after a harsh, long, and cold winter; we could all use a little freshness in our lives. 

This season we can look forward to the seemingly infinite assortment of delicious leafy greens available. Spinach, arugula, watercress, mustard, baby lettuce, chard... yum!

The best process to clean greens is to remove them from their stalk first. Then, fill up a sink or large bowl with cold water.  Place the greens into the water, and let them soak for 5-10 minutes. Periodically swish them around to dislodge any dirt or sand that may be stuck. After the time has elapsed, drain the water, and check the bottom of  the sink (or bowl) for leftover residue. If there happens to be a lot, it's smart to repeat the process one more time. Plan on using up all your leaves immediately - if you do not - wrap the remainder in damp paper towels and keep them in your vegetable crisper drawer until ready to use.

To naturally satisfy your sweet tooth, look out for strawberries, blackberries, blueberries, and raspberries. Since berries are super sensitive, it's best to wash them only when ready to use. To do so, place them in a colander or strainer and rinse them gently with cold water. Then, lightly lay them on doubled up paper towels to absorb any excess moisture. Store pre-rinsed berries in the refrigerator and away from humidity to keep fresh. If you're like me, you shouldn't have any trouble eating them all up in one fell swoop.   

Spring brings us roots and tubers too - new potatoes, carrots, celeriac, and turnips are just a few. These vegetables should be scrubbed individually under cold water with a hard-bristled brush. Do so even if you plan on peeling off the skins. Potatoes and celeriac should be stored in a cool, dark place (away from onions - as they emit gases that can spoil each other). Carrots and turnips are to be removed from their greens, and kept in the vegetable crisper of your refrigerator. 

Photo by Bobbi Lin
* For those of you who prefer to clean with something stronger, I would suggest using a 1 to 3 mixture of white wine vinegar to water, rather than the commercially-made vegetable sprays.  

* Certified organic produce need to be washed too! Oh, and same goes with those bagged salads that claim to have been "triple-washed." Yep, sorry, there's no getting around this one! Once you take your first delicious bite, you'll forget all about it. 


Thursday
Mar102011

Queenie Cooks: Homemade Gremolata Breadcrumbs


Let's talk frugality. I'm all for indulgence, especially when it comes to my food budget, but that doesn't mean that one need be wasteful, does it? Celery tops should always find their way into the soup pot, beet greens into your stew and the ends of loaves of bread into your food processor.

It's one of life's great twists, actually, that one of the cheapest things on earth - homemade breadcrumbs - are also one of the tastiest. There's very little out there that gives the richness and texture you get from a freshly toasted batch of breadcrumbs. The Italians, masters of use-it-up cuisine, sprinkle them everywhere, including on top of pasta. What could be more indulgent than that, right?


I'm currently in lust with a recipe I spotted on Food52, which mixes Japanese panko crumbs with lemon zest and parsley to yield a gremolata breadcrumb, the perfect topping, for, well, anything. The recipe pairs the crumbs with roasted cauliflower, but I think they'd be just as luscious on top of buttered pasta, steam broccoli or roasted sprouts. I'm obsessed, to say the least.

Obsessed.

Gremolata Breadcrumbs

Heels of one loaf of white bread, preferably baguette
1 tbs. olive oil
Zest of one lemon
1 clove garlic, finely chopped
1 tbs. parsley, finely chopped

Place the bread in the bowl of a food processor (large or small) fitted with the blade attachment. Pulse several times until the bread has formed uniform, somewhat fine crumbs.

Heat the olive oil in a small saute pan over medium-high heat. Add the breadcrumbs and toast for a few minutes, until they are golden. Add the lemon zest and garlic and continue to cook, stirring constantly, until the mixture is fragrant and the breadcrumbs are golden brown.

Remove from the heat to a small bowl and toss with the parsley. Use like mad on everything in sight. The breadcrumbs will keep, tightly covered at room temperature, for a few days.

Makes 1/2 cup or so of breadcrumbs.

Thursday
Mar032011

Kitchen Basics, Lesson 2, Homemade Ricotta!


Take a deep breath.

Yes - that's right, I said homemade.

Now before you get all nervous, hear me out. This recipe is 
s-i-m-p-l-e, not to mention delicious. I can promise that you'll never crave the tub stuff again.

Personally, I love myself some good ricotta. When it comes to sweet and savory versatility, there's just no competition. 

If you've ever added a bit to pancake batter, or eaten a smear on crusty bread with honey and sea salt; you probably understand my obsession.

I'm making myself hungry, let's make some cheese already.

Homemade Ricotta
Adapted from 101 Cookbooks

Yields about 2.5 - 3 cups

Ingredients
1 quart buttermilk
1 gallon whole milk
(Yes, only two - told you this was easy!)

Special Equipment
Sieve or Colander
Cheesecloth
Thermometer (optional)

Line a sieve or colander with 5-6 layers of cheesecloth. Leave about 2 inches of cloth overlapping on the sides. Place a bowl underneath. Reserve.

Pour entire contents of milk and buttermilk in a large saucepan over medium-high heat. If using, attach a kitchen thermometer to the inside wall of the pan. 

Stir the milk gently as it is warming up, making sure to scrape the bottom and sides. Once this gets to a certain temperature, you will notice the milk separating into curds, and whey. The curds will rise to the top and resemble cottage cheese - the whey will be all the liquid left behind.


When your thermometer reads 175 degrees, or when the curds have formed a thick even layer on top of the pan, turn off the heat. With a ladle, spoon the curds into your prepared sieve - allowing for the whey to drain. 
Continue until all the curds are out of the pan. Then tie the cheesecloth into a bow and leave to drain at room temperature for about 20 minutes. 

After 20 minutes (or desired texture has been reached), open the cheesecloth and season your ricotta to taste. You may also add herbs here if you'd like.

Your delicious ricotta is now ready to enjoy! Remember to keep refrigerated; best if used within 5 days. 

* This recipe will yield a lot of leftover whey. You can toss it, but I prefer to keep it. This by-product is widely known to be a powerful nutritional supplement containing vitamins, minerals and protein. Add to soups for a tangy flavor, into baked goods for added moisture or as cooking water for rice and other grains. Sprinkle some over your pets food to give them a nutritional boost too!