Lookin' for something?
Hey, Look! We're on

Entries in cooks (45)

Thursday
Aug052010

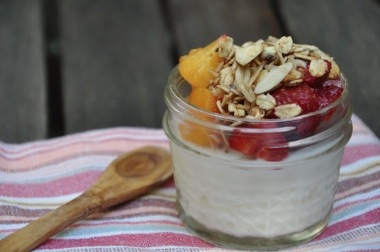
Coconut Almond Granola

I know there are people who don't enjoy breakfast, but I can't pretend to understand what that would be like. It might be my favorite thing I eat all day. My enthusiasm would probably lead one to believe that I'm talking about light fluffy omelets, belgian waffles overflowing with berries and maple syrup, or maybe a huge pile of huevos rancheros. I enjoy all of those things on occasion, but it's a simple joy that gets me out of bed most mornings: oats (oh, and coffee with a huge layer of frothed milk, but that's a story for another day). I happily scoop up oatmeal for breakfast day after day for approximately 8 months out of the year. The other four months, the hot months, I like my oats baked into crunchy granola goodness.

This is my current go-to recipe, but it can be tweaked in a million different ways. You don't have chia seeds? See below for other suggestions. You hate almonds, but love pecans/walnuts/some other nut? Use the nut you enjoy. You don't have coconut oil? Melted butter or another light oil will work just fine. You like your granola to have a little spice? Cinnamon and ginger are tasty additions.

You'll notice that I don't add any dried fruit to this at the end. Here is my reasoning: Dried fruit makes homemade granola soggy if it is unrefrigerated. If you refrigerate the granola with the fruit, the dried fruit gets hard and sticks to your teeth when you eat it. Instead, just add the dried fruit when you fix your morning bowl. It will be perfect every time and you can change the fruits around to suit your whims. In the summer I usually forgo dried fruit altogether and luxuriate in the bounty of peaches, nectarines, and berries on my kitchen counter. Mixing the granola with freshly shredded apple and plain yogurt (a la traditional muesli) is also one of the best breakfasts around.
Coconut Almond Granola
Ingredients:
5 cups rolled oats
2 cups sliced almonds
1.5 cups shredded, unsweetened coconut
1 cup chia seeds (flax seeds, wheat germ, or rinsed and drained quinoa all taste delicious as well)
3/4 cup real maple syrup
1/4 cup virgin coconut oil
1 tablespoon vanilla extract
1/2 teaspoon salt
Directions:
Preheat the oven to 300 degrees.
Combine first four ingredients in a large bowl. Warm the maple syrup and coconut oil in a small saucepan. Remove from heat and stir in vanilla extract and salt. Pour the maple syrup mixture over the dry ingredients and stir until the oats seem evenly coated.
Spread the mixture across two rimmed baking sheets and bake for about 30 minutes, making sure to stir and rotate the pans every 7-10 minutes. Your kitchen should smell mouthwateringly delicious right about now. Remove the pans from the oven and allow the granola to cool. Since this recipe makes a large batch, you'll want to store the granola in an airtight container in your refrigerator. Or you could get yourself a friendship promotion by doling it out everyone you encounter this weekend.

Enjoy!

Don't forget to enter our giveaway for 10 yards of handmade garland!  Just visit yesterday's post for details.

Thursday
Jul292010

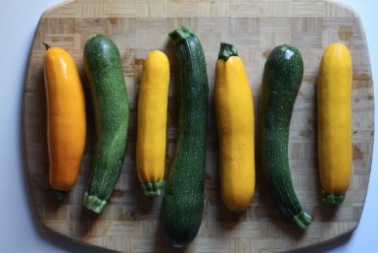
Roasted Summer Squash with Goat Cheese & Fresh Herbs

We here at YOU + ME* are way into summer. We love the weather, we love the trees being in full leafy bloom, we love eating dinner when it's still light out, we love any excuse to go barefoot, and, as you might have gathered, we love the produce. As those of you who garden can attest to, nothing really says summer bounty like summer squash. Seriously, they're like the rabbits of the vegetable world. Fortunately, they are also super duper delicious.

The other day when we were working on some top secret plans (we promise you will be let in on the secret soon!), we stopped off at Bklyn Larder for some lunch. They had the most delicious-looking salads available in addition to sandwiches and the regular provisions, and we ultimately decided to split a little bit of their roasted summer squash. It was perfection, summer at its finest, a chance for the produce to shine. Here is our interpretation of that salad.

Ingredients:
6 medium summer squash (I used 4 yellow and 3 green zucchini)
olive oil
salt & pepper to taste
3.5 oz mild raw goat cheese (look for one that is on the creamy, rather than dry, side)
1/3c loosely packed mint
1/3c loosely packed parsley

Directions:
Preheat oven to 350 degrees. Cut your squash into roughly 1"-1.5" pieces, and put in a baking pan. Drizzle with olive oil and generous amounts of salt and pepper, and roast, uncovered, for 40 minutes, stirring once after 15 minutes, and once after 30. Roast until the squash is tender.
Remove from oven, and let cool. When the squash is completely cool, crumble the goat cheese over the pan. Coarsely chop the herbs and add them to the mix. Serve room temperature.

Bon Appétit!


Thursday
Jul222010

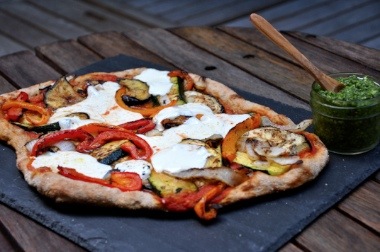
Grilled Pizza Goodness


Poor pizza is misunderstood. Yes, even bad pizza is almost undeniably delicious, but it's always lumped into the junk food category with greasy french fries and poultry rendered unrecognizable as nuggets. The most delicious pizza need not be an indulgence. In fact, it can practically be a health food. Give this pizza a try and you can make pizza night a weekly event (we do!), while patting yourself on the back for being such a healthy eater.

Friday night is pizza night at our home. Seeing as how our New York apartment lacks a stone hearth and our pint size oven mocks us with erratic temperatures and unpredictable results when we crank it up high, we had to take our pizza making outside. Every time we consider moving from our apartment, we quickly come to our senses when we think about our cozy backyard and it's most frequently used feature: our grill. Maybe it's because I will always be a California girl at heart, but we grill everything all year round. Sometimes this is out of laziness on my part (grilled vegetables mean one less cookie sheet to wash than roasted veggies), but in the case of pizza, it's a matter of necessity. Only the grill gives our crust the crunch it needs to withstand the mountain of vegetables I pile upon it.

One goal of our pizza night is to make room in the fridge for our weekend farmer's market trip, which means our toppings are purely a function of what we have on hand. Below are last week's creations, but don't feel limited by our leftover produce. Your pizza deserves your favorite toppings.

Ratatouille Pizza: spicy tomato sauce, with grilled eggplant, zucchini, peppers, and onions, topped with fresh mozzarella

Grilled Pizza

Ingredients:
- Whole grain pizza dough (You can buy this from your favorite pizza place for about $3/lb or pick it up at a grocery store like Whole Foods or Trader Joe's. If you would rather make it yourself, try this recipe)
- Some sort of sauce (we've been known to use tomato sauce, pesto, white bean puree, ricotta, or just plain olive oil)
- Toppings (we're veggie people, but you can go crazy with meat if that's your preference)
- Cheese (mozzarella, goat cheese, blobs of ricotta, or even homemade cashew cheese can all be delicious)

Supplies:
Can you grill pizza without a pizza stone or peel? Yes, but we have found that those two supplies both simplify the experience and improve the result. You can find the pizza peel we use on Amazon and our pizza stone at Sur La Table. If you think grilled pizza may become a regular feature in your life, these two products are well worth the initial investment.

Technique:
Place your pizza stone on the grill and begin to preheat about 45 minutes before you expect to grill your pizza. Make sure all your toppings are ready for assembly. In most cases, this will mean grilling veggies, caramelizing onions, or slicing/shredding cheese.

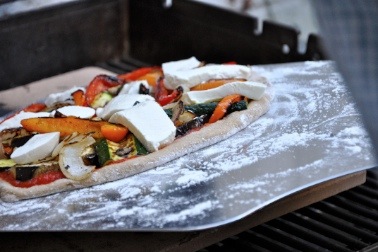
Give your pizza peel a liberal dusting of flour and cornmeal. Toss or roll your dough to the desired thickness (we've experimented with both paper thin and slightly thicker crusts and both consistently turn out great) and place on the pizza peel. Start moving quickly at this point, so your pizza doesn't stick. Spread your sauce and arrange toppings and cheese to your satisfaction.

Make sure the temperature on your grill is hovering around 500 degrees (your pizza stone retains a massive amount of heat, so this temperature is sufficient). Open your grill cover and slide your pizza from the peel onto the stone with a quick backward motion. This may take a couple tries to perfect, but your pizza will still taste good even if you have to pile on some mangled toppings during your early attempts. Close the grill cover immediately and resist all urges to "check" your crust. After about 4 and a half minutes, open your grill cover and remove the pizza with your peel. The crust should be golden and your cheese should be melted.

If you're grilling multiple pizzas (and I highly recommend that you do since you palate deserves a little variety), close the grill cover immediately after removing your pizza. Ideally, you will wait a couple minutes before preparing your next pizza to give the grill time to reheat. Your first pizza can be kept warm on a cookie sheet in the oven while your next pizza cooks without compromising texture or flavor.

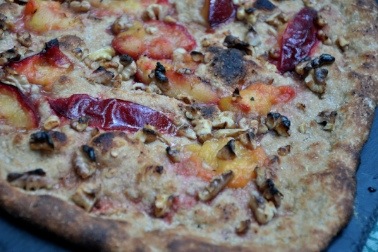
The other product of last week's pizza night: grilled plums, walnuts, and caramelized onions

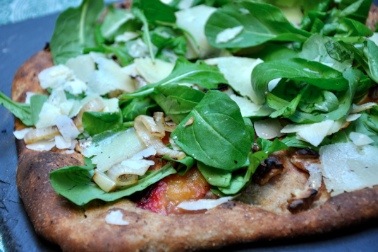
Topped with arugula and shaved manchego cheese after the pizza was removed from the grill


Enjoy!

Thursday
Jul152010

Lemon Blueberry Pancakes


This is my absolute favorite time of year for eating. The pure abundance of gorgeous fruits and veggies at the farmer's market right now makes up for the three months of gnarled root vegetables and mealy apples (let me amend that to say "almost makes up," lest I poke someone in the eye with a rutabaga for reminding me I said that in the midst of next January's market doldrums).

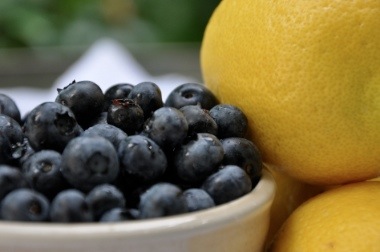
I hate to play favorites when the pickings are so bountiful, but I must confess my undying love for blueberries (cover your ears nectarines, I would never deny my fondness for you). When my daughter and I aren't eating blueberries plain by the pint, I'm adding them to something else--salads, smoothies, peanut butter toast, muffins, ice cream. You name it, I've probably put a blueberry in it. So when my husband confessed a craving for blueberry pancakes last weekend, I happily dug the griddle out from its hiding place and set to work.

This recipe is loosely based on this whole grain pancake recipe by the ridiculously talented Heidi Swanson of 101 Cookbooks. As far as I'm concerned, everything that comes out of her kitchen tastes like rainbows, but, you know, the healthy kind. That being the case, it would probably be wise for you to follow her recipe. However, if white whole wheat flour isn't your favorite and you find yourself lacking buttermilk when your blueberry pancake craving hits, you could always give this recipe a try.


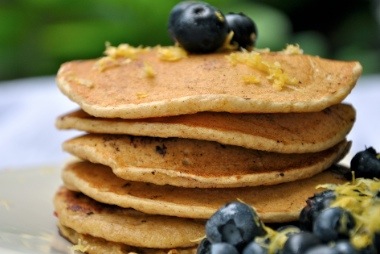
Whole-Grain Lemon Blueberry Pancakes

Ingredients:

1 1/2 cups whole wheat pastry flour
1/2 cup cornmeal
1 teaspoon aluminum-free baking powder
1/2 teaspoon baking soda
1/4 cup natural granulated sugar
1/2 teaspoon fine grain sea salt
2 cups, plus 2 tablespoons lowfat milk
2 tablespoons lemon juice
2 large eggs, lightly beaten
2 tablespoons butter
zest of one lemon
1 pint blueberries, rinsed


Combine the dry ingredients in a large bowl and create a well in the center. Add the milk, lemon juice, eggs, butter, and lemon zest to the well and gently whisk together. Stir all the ingredients until just combined (it's better to have a few lumps than to risk tough pancakes from overmixing).

Heat your cast iron pan, skillet, or griddle to medium and brush with a little butter. Pour batter onto your griddle by tablespoons for silver dollar sized pancakes or 1/3 cups if you prefer larger pancakes. Add the desired amount of blueberries to each pancake (adding them at this point, rather than stirring them into the batter, ensures an even distribution of blueberries and prevents blueberry lovers from analyzing each pancake before picking those with the highest blueberry to pancake ratio). Flip the pancakes when bubbles form and the bottom is golden brown. Remove when cooked through and repeat with the remaining batter.

If you're dining with a civilized bunch who choose to wait to eat until the cook is out of the kitchen, you can keep your pancakes warming in the oven. I've had the greatest success at preventing sogginess by placing cooked pancakes on a cookie sheet in a single layer with the oven at 150 degrees.

Serve with butter, maple syrup, lemon zest, and a mountain of additional blueberries.


Thursday
Jul082010

Roasted Peach Frozen Yogurt!

It is hot here in the city. I mean, like "take your clothes off and lie in front of the fan and chores and nosy neighbors be damned" hot. On the bright side, though, this is the kind of weather that makes ice cream feel like a legit meal. What are we having for lunch? Ice cream? Perfect.
I recently got my husband an ice cream maker for his birthday per his request. Did he request said ice cream maker because he loves to cook? Au contraire. It was because he saw all of the delicious homemade ice cream in the June/July issue of ReadyMade, and wanted me to take up making ice cream for him. Given that ice cream is my favorite food ever (this whole pie v. cake nonsense is silly to me, mainly because the clear winner is ice cream), I happily obliged. I've churned out a few batches so far, but the very best is this little treat I put together last weekend.
I decided to roast my peaches, since it is still early in the season and they were a bit tart and firm. And you know what? It might be one of the better culinary decisions I've made. The roasting brought out a deeper peach flavor, and made the texture better for the yogurt. This has just a sprinkle of sugar (not even necessary if your peaches are sweet) and the tiniest bit of honey. It may even be healthy enough to call a meal.

Roasted Peach Frozen Yogurt

Ingredients:

4 peaches, preferably local and organic
1 17.5 oz container of greek yogurt (the higher the fat content, the creamier your yogurt will be!)
1 cup whole milk (I used 1/2 cup of buttermilk instead of 1/2 of the cup of milk, because I like the tang)
1T vanilla extract
honey to taste (I ended up using about 1/8 cup)
Preheat oven to 375. Cut the peaches in half and lay cut side down in a rimmed baking dish. If the peaches are still very tart, sprinkle with sugar to taste (I used about 1tsp. organic brown sugar). Cook for 35-45 minutes, until the peaches soften and bubble. They may also start to brown on the tops. Let cool for at least 15 minutes, then chop into 1/4-inch chunks. Reserve the syrup-y juice from the bottom of the pan. Set aside.

In a medium-sized bowl, combine yogurt, milk, vanilla, and honey if you wish to add it. You can always sweeten more later. Whisk until mixture is smooth. Pour mixture into your ice cream maker and freeze according to the manufacturer's instructions. Five minutes before the end of your churning time, add the peaches and syrup that you reserved. Taste the mixture and sweeten more if desired.

When your yogurt is finished churning, transfer to an airtight container and freeze for at least 2 hours before eating. (This is an instance where "Do as I say, not as I do" applies very well.)

Enjoy!

Page 1 ... 1 2 3 4 5