Lookin' for something?
Hey, Look! We're on

Entries in cooks (45)

Thursday
Dec162010

Do You Know What Are Unbelievably Delicious?

Photo by Angela Gaspar for YOU + ME*

If you said snickerdoodles then we should totally be friends. While I know there are a lot of tasty things in this world, there is a special place in my heart for the soft, cinnamon sugary goodness that is a snickerdoodle. I'm pretty sure it's the taste, but it may be something about the name too. After all, just try and frown while saying snickerdoodle.

If you join us over on Holiday today, you'll be whipping up a batch of these in no time flat. I recommend giving half away immediately. If you keep them all for yourself, I can't guarantee that they'll last more than two days and I don't want to be responsible for your sugar coma.

Thursday
Dec092010

Queenie Cooks: Hot chocolate, boozy and non.

I don't know what the weather is like where you are, but here in New York City, wintry winds and bone-chilling freezes are upon us - finally! And yes, by "finally," I mean, "yay!" See, unlike many normal human beings, I crave the cold. I absolutely love wintertime, especially when it's new and fresh and crisp and clean like it is in New York in December. (Snowstorms in March are, I grant you, a bit tiresome.)

Wintertime - and especially the holiday season - means sparkly decorations and twinkly lights, and it's a time when cocktails come in two varieties: hot and cold. Yes, winter is the season of the hot buttered rum and hot toddy, but also of eggnog and shaker upon shaker of brown-liquor cocktails. It is also the season of spiking. Sure, summer has spiked lemonade, but hot spiked drinks are really where it's at, if you ask me.

You toss a little whiskey into your coffee, or maybe some rum into your tea, but my heart is with the combination of smoky, sweet bourbon and rich, creamy hot chocolate. When my apartment turns so delightfully chilly that I need a blanket to enjoy sitting on my couch, I turn to this tried and true combination to warm me up from the inside out, and it works every time.

Hot chocolate I have known and loved; both photos from my trip to Prague in 2006.

Now, don't go trying this with hot chocolate from a box, canister or (heaven forfend) a paper packet. If you're treating yourself you should, well, treat yourself. You deserve quality chocolate. Really, you do. (I typically go for Scharffen Berger for this recipe, but Guittard is s slightly less-expensive, still-really-tasty option.) And don't go skimping on the whipped cream, either. This hot chocolate means serious, thick business, and you'll want the cream to cut through the richness of it all.

Last, but certainly not least: if you prefer to go booze-free here, please do so. This recipe is in fact originally a non-alcoholic one; I just have a tendency to enjoy the holidays as an excuse for profligate cocktailing. There's no need for you to fall into my debaucherous ways.

Though I'll be over here with the bourbon if you decide you must.

(Spiked) Hot Chocolate
Adapted from Pierre Hermé

2 cups milk
1/4 cup water
1/4 cup sugar
4 ounces bittersweet chocolate, melted
4 tbs. bourbon
Lightly sweetened whipped cream, for serving

Bring the milk, water, and sugar to the boil in a medium saucepan, stirring until the sugar dissolves. Add the chocolate and, stirring with a whisk, heat the mixture until one bubble pops on the surface.

Pull the saucepan from the heat and whip the hot chocolate for one minute with an immersion blender or in a regular blender.

Divide the bourbon evenly and pour it into two large mugs. Pour or ladle the hot chocolate into the mugs, dividing it evenly between the two. Stir gently a few times to distribute the bourbon throughout the chocolate. Top with the whipped cream and serve immediately.

Alternatively, you can pour the hot chocolate into a container to cool. The hot chocolate can be made up to two days ahead (without the bourbon) and kept tightly covered in the refrigerator. Reheat gently on the stovetop.

Serves two, generously.

Thursday
Nov252010

Queenie Cooks: Latkes!

Even though I'm half-Jewish by descent (the paternal half), I didn't grow up celebrating Hanukkah, aside from the macaroni-and-glitter adorned dreidls I made in art class. My dad wasn't terribly religious, and the pull of my mom's Episcopalian family's picture-perfect New England Christmas was irresistible to all of us, I think. And so, it wasn't until I was in my 20s and living alone that I started to make latkes with any kind of regularity.

Latkes, along with doughnuts, their sweet compatriots, are traditional Hanukkah fare. Why, you ask? Because Hanukkah is that most wonderful of holidays, the one at which we celebrate fried food.

Okay, okay - so, technically, we're celebrating the miracle of the oil that burned in the temple's lamps for eight whole days following its re-dedication to the God of Israel (full story here). But you know what you do with oil when you want to feature it on a holiday table? (All Jewish holidays requiring an accompanying feast, of course.) Fry crap in it. Duh!

Hence latkes, hence doughnuts, hence awesomeness. Now, traditionally, latkes are made with potatoes (typically russet), usually accompanied by some combination of grated onion, beaten egg, and possibly a little flour. They are delicious little nuggets of potato goodness, made even better by the addition of sour cream and apple sauce.

Lately, in an effort to bring a little variety and color to the Hanukkah table, people have been roping in other vegetables for latke duty. Today, I'll be calling on zucchini, in all its ridiculous goodness, to make little latke-like fritters.

In a simultaneous nod to and twist on tradition, I've topped my potato latkes with a favorite apple-cranberry chutney of mine. The zucchini latkes are served with creme fraiche (the snooty version of sour cream) and a healthy dose of gremolata, the traditional Italian condiment made of minced lemon zest, garlic and parsley. That said, you should feel free to mix it up - I'd be lying if I said I didn't try the creme fraiche and gremolata with the potato latke, and lying even more if I told you it wasn't awesome. (Like a sour cream and chive potato chip taken to new heights.)

However you choose to serve your latkes, I just hope you give them a go. You'll be pleasantly surprised, I think, by how easy they are to make, and by how easily they please a crowd - even at a Christmas party! (Especially good news for halfsies like me.) Hankkah starts on December 1st, though, so there's no need to delay.

Note: This recipe involves deep-fat frying, which means you definitely need the right thermometer. You might also want a splatter screen to place over the skillet in between flipping the latkes. You can get both pieces of equipment for really reasonable prices; try this thermometer and this screen.

Potato Latkes
Adapted from Gourmet

1 medium white onion
3 lbs. russet potatoes (about 6 potatoes), peeled and submerged in cold water
2 tsp. lemon juice
1/3 cup flour
3 large eggs, lightly beaten
Canola oil, for frying

Using the large holes on a box grater (or the shredder attachment for your food processor), grate the onion and then the potatoes into a large bowl. Stir in the lemon juice. Stir in the flour, then add the eggs and stir to coat evenly.

Transfer the mixture to a colander set over a bowl to release some of the juices.

Pre-heat the oven to 200 degrees Fahrenheit. (Depending on your oven, this might mean the "warm" setting.) Meanwhile, heat about 1/4 inch of oil in a large, flat-bottomed skillet to 360 degrees Fahrenheit over medium heat. (I used my 12-inch straight-sided skillet.)

Once the oil is hot, use a quarter-cup measure to scoop out individual latkes into the oil. Use a fork or the back of the measuring cup to flatten the pancakes a bit. (They should be about three to four inches across.) Fry the pancakes in batches of four to six, cooking for about three minutes per side, or until the latkes turn golden brown. Turn them using a fish spatula, if you have one.

Once the latkes are cooked, transfer them to a paper towel-lined cookie sheet and place the cookie sheet in the oven until all the latkes are done and you're ready to eat!

You can also cool the latkes completely on the cookie sheet, then freeze them for up to two weeks. Re-heat them in a 450 degree oven for about 5 minutes before serving.

Makes about 20 latkes.

Zucchini Latkes
Adapted from Gourmet

3 lbs. zucchini, stem ends removed
1 1/4 cups plain, fine dry breadcrumbs
2 eggs, lightly beaten
1/2 tsp. dried thyme
Kosher salt and freshly ground black pepper
Canola oil, for frying

Using the large holes on a box grater (or the shredder attachment for your food processor), grate the zucchini into a large bowl. Toss the zucchini with two teaspoons of salt and let sit for 30 minutes.

Working in batches, squeeze the zucchini dry in a kitchen towel and transfer to another large bowl. Stir in the bread crumbs, eggs, thyme, 1/4 tsp. salt and a few turns of freshly ground black pepper.

Pre-heat the oven to 200 degrees Fahrenheit. (Depending on your oven, this might mean the "warm" setting.) Meanwhile, heat about 1/4 inch of oil in a large, flat-bottomed skillet until it shimmers. (I cooled down the oil I used for the potato latkes, then re-heated it for these.)

Scoop two tablespoons of the zucchini mixture to form each pancake, flattening them a bit with a fork. You can make 6-8 pancakes per batch. Fry the pancakes until golden brown, about 2 minutes per side. Transfer to a paper towel-lined baking sheet and keep them warm until serving.

Makes about 35 latkes.

Apple-Cranberry Relish
Adapted from Gourmet

2 lbs. sweet-tart apples, such as Gala or Honeycrisp, peeled, cored and cut into 3/4 inch chunks
1 medium onion, cut into one-inch pieces
2/3 cup dark brown sugar
1/2 cup fresh orange juice
3 tbs. unsalted butter, melted
2 tsp. mustard seeds
1/4 tsp. ground ginger
1/8 tsp. ground cloves
1/2 lb. fresh cranberries

Place the oven rack in the top third of the oven and pre-heat to 400 degrees Fahrenheit. Stir all ingredients - except the cranberries - together in a shallow glass baking dish until evenly mixed. Spread out into an even layer.

Place the baking dish in the oven and roast the mixture, stirring it every 10 minutes or so, for 45 minutes to an hour, until the apples are well-softened. Remove the dish from the oven and stir in the cranberries.

Return the dish to the oven for another 15 to 20 minutes, until the cranberries have softened and most of the liquid has been absorbed. Serve warm or at room temperature.

Chutney keeps well for up to three days. Cool completely, then cover with plastic wrap and store in the fridge.

Gremolata

1 lemon
1/4 cup parsley, minced
3 cloves garlic, minced
Pinch of salt

Remove the zest (just the zest - not the bitter, white pith) from the lemon using a vegetable peeler, then mince it as finely as possible with a knife. Combine in a small bowl with the parsley, garlic and salt.

Thursday
Nov182010

Variations on a Theme: Carrot Oat Cookies

Now, hear me out, everyone, before you get all "I can't BELIEVE she's posting that hippie BS right before Thanksgiving" on me.

I like my butter and stuffing (mmm, stuffing) and pie as much as the next girl, but there are tons of recipes out there for all of that stuff. Right around Thanksgiving, my life starts getting busy. Like, "Wow, it's already 5pm and I haven't eaten today" busy. These cookies are perfect to pack up and tuck away in your purse for when you're on the subway platform and are struck with a case of the ohmygoodnessineedtoeatNOWs. I can be a picky eater, especially when I've reached the point of extreme hunger (weird, I know), so finding something out and about that suits my fancy can sometimes be difficult.
These are vegan with no processed sugar, and are made with whole grains. Plus, they're super yummy, so it's a good bet that one of these will be just right for a snack on the go. Jordy loves it when I pack these, not because he likes to eat them (which he does), but because it guarantees that I won't turn into the hunger-induced monster who I've been known to become when I've waited a little too long to eat. I adapted this recipe from 101 Cookbooks, and these have been in heavy rotation with multiple variations ever since. Here are my two favorites. I've also been known to make these with sweet potato (be sure to mush out some of the moisture and use a little less sweetener).

Carrot Spice Cookies
Ingredients:
1 cup whole grain pastry flour
1 cup oats
1 teaspoon baking powder
1 teaspoon cinnamon
1/2 teaspoon nutmeg
1/2 cup unsweetened shredded coconut (if you have a fresh coconut laying around, you can shred it with your handy microplane grater)
1/2 teaspoon salt
1/2 cup shredded carrots
1/2 cup shredded zucchini
1/2 cup agave nectar
scant 1/2 cup olive oil
juice of 1/2 lemon
zest from 1/2 lemon

Directions:
Preheat oven to 375 degrees.  Line two baking sheets with silpats or parchment paper.
In a large bowl, mix the flour, oats, baking powder, coconut, cinnamon, and nutmeg, and then stir in the carrots and zucchini.  In a smaller bowl, whisk together the agave nectar, olive oil, and lemon zest and juice.  Pour the wet ingredients into the dry, and stir until mixed.
Drop the batter by rounded teaspoonfulls onto your baking sheet, and bake in the top 1/2 of the oven for 12-15 minutes, or until the tops and bottoms are golden brown. 

Carrot Coconut Cookies
Ingredients
1 cup whole wheat pastry flour
1 teaspoon baking powder
scant 1/2 teaspoon fine grain sea salt
1 cup rolled oats
2/3 cup shredded coconut
1 cup shredded carrots
1/2 cup agave nectar, room temperature
1/2 cup unrefined (fragrant) coconut oil, warmed until just melted
1 teaspoon grated fresh ginger

Directions:
Preheat oven to 375 degrees.  Line two baking sheets with silpats or parchment paper.
In a large bowl, mix the flour, oats, baking powder, and coconut, and then stir in the carrots.  In a smaller bowl, whisk together the agave nectar and coconut oil.  Pour the wet ingredients into the dry, and stir until mixed.
Drop the batter by rounded teaspoonfulls onto your baking sheet, and bake in the top 1/2 of the oven for 12-15 minutes, or until the tops and bottoms are golden brown.  

Have a lovely Thursday, everyone! Be sure to sign up for our Spread the Cheer gift exchange (time's running out!), and keep sending in your Thanksgiving slideshows!

Thursday
Nov112010

Queenie Cooks: Roasted Tomato Salad

Hey there, cats and kittens! While Miya and Elisabeth have been tempting you with visions of sugarplums and whatnot, I've been dreaming of summer's long-gone produce, and obsessing in particular over a salad I ate about twice a week in August and September: Frankies Spuntino's tomato and avocado salad.

The Frankies (there are two of them, you see) describe it as "making gazpacho in your mouth," and they're right. Even though there's no avocado in the traditional Spanish soup, the ingredients (tomatoes, avocado, red onion, olive oil, sherry vinegar, sea salt and pepper) somehow combine in each bite to create an experience akin to, yes, gazpacho.

But, obviously, the time for this salad has passed. It would be pointless to make it with an early northeastern winter's listless, anemic tomatoes, even if I could find any at the market. And so, when I was whining to Miya a few weeks back about craving the salad and not knowing what to do about it, she suggested I try creating a version with roasted tomatoes.

Roasting those same plain Jane tomatoes turns them sweet and smoky, you see, the heat lending them character where once there was none. And even though I didn't have any avocado on hand, I decided to put the plan in motion, roasting some plum tomatoes with olive oil, sherry vinegar and slivers of red onion. A shower of flaky sea salt and a few turns of the pepper mill later, I had a plate full of winter-turned-summer.

Unlike most vegetable-based salads, this one is easy to make ahead; just roast the tomatoes up to two days before serving them, place them in a bowl with a drizzle of olive oil, and cover everything with plastic wrap. When the time comes, take the tomatoes out of the fridge about 45 minutes before you want to serve the salad. Just before serving, toss the tomatoes with the rest of the ingredients. Boom. Salad. Done.

(This salad is also great as a pasta; just toss the salad with hot pasta and a little extra salt. Boom. Pasta. Done.)

Roasted Tomato Salad

6 plum tomatoes, halved lengthwise
1/4 cup olive oil, plus extra for drizzling
Kosher salt
Freshly ground black pepper
1 tbs. sherry vinegar
1/3 small red onion, sliced as thin as possible
Sea salt

Pre-heat the oven to 400 degrees Fahrenheit. Use aluminum foil to line a pan or skillet just large enough to hold the tomatoes in one layer (I used an 8-inch skillet). (A too-large pan may lead to a very smoky roasting process.) Arrange the tomatoes in one layer and drizzle with enough olive oil to lightly coat the tomato halves on all sides. Sprinkle generously with kosher salt and pepper.

Roast the tomatoes for 35-45 minutes, until they are softened and just beginning to char. If you plan to finish the salad later, place the tomatoes in a bowl with a drizzle of olive oil, and cover it with plastic wrap. When the time comes, take the tomatoes out of the fridge about 45 minutes before you want to serve the salad, and continue with the recipe.

In a small bowl, whisk together the 1/4 cup of olive oil and the vinegar. Place the tomatoes and onion in a large bowl. Pour the oil and vinegar mixture gently over the tomatoes. Salt generously with sea salt, and sprinkle with a bit of pepper. Toss the salad gently (use a silicon or rubber spatula if you have one).

Transfer the salad to plates and serve with additional sea salt and pepper at the table, because everyone's different.

Serves 2-3, depending on craving levels.

Thursday
Nov042010

Chickpea Curry with Greens & Cardamom Ice Cream with Roasted Pears

Happy Thursday, my friends! This past weekend, my mom was in town (she just left yesterday afternoon, and if any of you want to come over and give me a condolence hug, it would be greatly appreciated). We hightailed it out to Stone Barn Farms to check out the fall foliage and autumn harvest, and boy, were we in for a treat. We saw...

geese migrating,
sheep grazing,
sprouts sprouting,
and leaves turning.
To say it was fall at its most glorious would be an understatement. When we came home, we were in the mood for a quick, hearty stew that was easy and would use a few of the ingredients that we picked up at the farmers' market on Saturday. I knew just the thing, since I have been making and eating this dinner over and over and over for a few weeks now. The best thing about this stew is that it is versatile. No fresh tomatoes? Use canned. No kale? Use spinach, dandelion greens, collard greens, or chard. Easy peasy lemon squeezy.

Chickpea Curry with Greens
Ingredients
1 cup dried chickpeas, soaked overnight, then cooked with 1T salt for 1 hour over medium-low heat, drained and rinsed
2T canola or olive oil
1 medium yellow onion
2T mustard seeds
2T curry powder
2T pudini masala
5 fresh tomatoes, chopped into 1" cubes
1 bunch of greens, like spinach, kale, chard, or collards (I used cavolo nero, or dinosaur kale). 
Directions
Heat oil in a medium saucepan over medium high heat, and add onion. Saute until translucent, and add spices. Continue to cook until the mustard seeds start popping, then add the tomatoes. Let simmer until the tomatoes release their juices, about 5 minutes. Add chickpeas, simmer for another 10 minutes, and then add the greens. Simmer until the greens are tender but not overdone (this time will depend on the greens you use). Serve over rice, barley, or quinoa, and enjoy in good company!

But you didn't think I would leave you without dessert, did you? I made this ice cream last week to feed my new obsession with cardamom. I don't even have pictures of the process because it was a spur of the moment, throw-it-together type of thing, but holy cow, it is so good. I nearly lost a finger to the ice cream maker. 

Cardamom and Roasted Pear Ice Cream
Ingredients
1.25c heavy cream
1.25c whole milk
.5T vanilla
.5c sugar (you may want to use a tablespoon or 2 more if you like things on the sweeter side)
1T ground cardamom (if you are using whole, i would smoosh 5 seed pods and do things a bit differently--I'll give you a heads up in the directions)
Roasted pears (3 small pears, cut into 1/4" cubes, roasted with 1t sugar and 1T water at 350 degrees for 30 minutes, completely cooled)

Directions:
Heat milk, sugar, vanilla and cardamom (if using whole, just put the whole smooshed seed pod in there); let cook for 5 minutes taking care not to let it boil over. Let the milk mixture cool completely (strain if using the whole seed pod).
Whip the whipping cream until it holds soft peaks; fold into cooled milk mixture. Put the mixture in the ice cream maker, and let run for 25-30 minutes, adding the pears in the last 5 mins. This would also be super good with finely chopped candied ginger, so feel free to add that, too. 

Enjoy, pretties! See you tomorrow, when Elisabeth will be bringing you all sorts of holiday-related goodness! Have a lovely day!

Thursday
Oct282010

Queenie Cooks: Herbed Quinoa with Roasted Acorn Squash

[From Miya: Hi friends! We have a huge treat in store for you today (didn't I tell you we would?). Please give your warmest welcome to my dear, dear friend Meg, who is a fantastic cook, great writer, and amazing friend. Meg's blog and photography have been featured by Food52, Serious Eats, Apartment Therapy and The Internet Food Association. And her apartment is amazing. Here was her entry into Apartment Therapy's Small Cool contest in 2009 (do you like the pics? Meg plied me with pastries, and I took them for her). To top it all off, she mixes a mean Manhattan. Do you adore her already? I told you you would!
Meg will be joining us every two weeks to share a special, just for You + ME*, recipe with us. We've asked her to skew fairly healthy and vegetarian, which she does exceptionally well, but you would all be remiss not to check out the rest of her recipes over at Queenie Takes Manhattan. So without further ado, here is my dear friend Meg, giving us some ridiculous dinner inspiration.]
Hey, You + ME* readers! I cannot tell you how excited I am to be part of Miya & Elisabeth's community of contributors. I think we're going to have loads of delicious adventures together over the coming months, don't you?

When Miya asked me to contribute to You + ME* Equals, I knew exactly what I wanted to share with you guys. I'd been thinking for a few weeks about how the cooler weather makes me crave the nutty satisfaction of whole grains and the richness of roasted vegetables. As a result, I'd been dreaming about a mash-up of herbed quinoa and roasted squash.

Quinoa is a seed, similar to a grain. It's teeny and round and has a little white membrane thing that sounds gross, but really isn't. Thanks to its remarkable nutritional content, it's one of the oldest cultivated crops on earth, even though it never really took off in Europe (due, in possible part, to the naturally bitter coating you have to rinse off before cooking). It has an extremely high protein content and is naturally gluten-free. Just those two things alone pretty much explain its recent surge in popularity.

But, most importantly, it's also delicious. Quinoa is, as I mentioned, extremely nutty in flavor, and cooks up light and fluffy - but can also take on a creamy, risotto-like quality if cooked slowly and gently. Really, it's a great chameleon, perfect for pairing with braised dishes or tossing into salads.

The recipe I'm sharing with you today takes advantage of that warm flavor and ease of cooking. Like any other grain, quinoa does a bit better when you hit it with a little herbal goodness, so I threw in sage (also a natural partner to the squash) and thyme (since, um, I have it growing on my windowsill). You might think about rosemary here, or even a shower of fresh chives at the end. (In my opinion, chives are never a mistake.)

As for the squash, well, how can you celebrate the arrival of fall without paying tribute to its signature vegetable? This recipe would work equally well with butternut squash, or even pumpkin - whatever's available at your local farmers' market is what's best. Roasting squash is one of the easiest things you can ever do, and the slightly smooshy texture of the finished product plays wonderfully against the fluffy quinoa.

And so, without further ado, here goes! I hope you enjoy the recipe, and I can't wait to see you back here in two weeks' time!

Herbed Quinoa with Roasted Acorn Squash

1 small corn squash, about 1 pound
Olive oil
Kosher salt
Freshly ground black pepper
6 sage leaves
1 small shallot, finely chopped
1 clove garlic, thinly sliced
1/2 cup quinoa, rinsed one or twice in cold water
1/4 cup white wine
1 cup water or vegetable stock
2 or 3 sprigs thyme
1/4 cup finely grated parmesan cheese, plus more for garnish

Preheat the oven to 375 degrees Fahrenheit. Cover a small cookie sheet in aluminum foil.

Slice the stem off of the squash and slice it in half, lengthwise. Use a large spoon to scoop out the seeds. Slice the halves into three wedges each, and place the wedges on the baking sheet. Drizzle the squash with olive oil and sprinkle with about 1/2 teaspoon of salt and a healthy amount of pepper. Place a single sage leaf in the center of each wedge.

Bake the squash in the preheated oven until tender, about 20 minutes. Meanwhile, in a 2-4 quart saucepan, heat about 1 1/2 teaspoons of the olive oil over medium heat. Once hot, add the shallots and garlic and saute for about two minutes, until the shallot is translucent and the garlic is fragrant.

Add the quinoa to the pot and lightly salt it. Toast the quinoa in the oil and shallots for a couple of minutes, until it smells nutty. Add the wine to the pan and stir, mixing it well into the quinoa. Allow the mixture to cook down for a minute or so, then add the water or stock.

Reduce the heat to medium-low and cover the pan, cooking the quinoa at a simmer. Continue to cook for 10-15 minutes, or until the membranes begin to pull away from the grains.

Once the squash is done (you can tell by poking it with a knife; if the knife slides right on in, the squash is ready), take it out of the oven and set it aside until it is cool enough to handle with your hands. Cut the flesh away from the peel and slice it into 1-inch chunks. Place it (and the roasted sage leaves) in a large bowl. Add the leaves from the sprigs of thyme.

As soon as the quinoa is done cooking, add it (hot) to the squash, along with a healthy drizzle of olive oil and a good amount of salt and pepper. Toss everything together until well-mixed, then mix in the parmesan. To serve, divide between plates and top with a bit more cheese. The salad can be served warm or at room temperature.

Serves two as a main course and four as a side.

Thursday
Oct212010

An Easy Brunch

Does this ever happen to you:
You: "Honey, when are Joe and Sally coming over for brunch again?"
Honey: "Tomorrow, I think." [checks email] "Yeah, tomorrow at 10am."
You: "But its 11 o'clock at night now. What the f--- am I going to serve for brunch? [insert string of profanities here]"
Oh, it doesn't? Well. Me neither. And it definitely didn't happen to me last weekend. And I totally didn't use a string of profanities so foul I later worried that I had killed an angel or made the buddha's ears bleed or something.
But if it had happened, here's what I would have done. I would have packed Emi up to go to the farmer's market around 8, picked up apples, eggs, potatoes, and butter, stopped at the supermarket on the way back for some other provisions, and gone home and cooked the following:


Cheddar Apple Scones (via Smitten Kitchen)
[These are ridiculous. I want to make them and eat them again and again and again.]

Makes 6 generous scones
Ingredients:
2 firm tart apples
1 1/2 cups all-purpose flour
1/4 cup sugar plus 1 1/2 tablespoons for sprinkling
1/2 tablespoon baking powder
1/2 teaspoon salt plus additional for egg wash
6 tablespoons unsalted butter, chilled and cut into 1/2-inch cubes plus additional for baking sheet if not lining it with parchment
1/2 cup sharp cheddar, shredded
1/4 cup  heavy cream
2 large eggs
Directions:
Position a rack at the center of oven and preheat oven to 375 °F. Line baking sheet with parchment paper.
Peel and core apples, then cut them into one-sixteenths. Placed them in a single layer on a baking sheet lined with parchment paper and bake them until they take on a little color and feel dry to the touch, about 20 minutes. They will be about half-baked. Let them cool completely. Leave oven on.
Sift or whisk flour, sugar, baking powder and salt together. Set aside. Place butter in the bowl of an electric mixer with a paddle attachment, along with cooled apple chunks, cheese, cream and one egg. Sprinkle flour mixture over the top and mix on low speed until the dough just comes together. Do not overmix.
[I don't have a hand mixer, so I rubbed the flour mixture into the butter until it had the feel of breadcrumbs, then mixed in the rest of the ingredients.]
Generously flour your counter top and place the scone dough on top of it. Sprinkle with flour. Use a rolling pin to gently roll the dough into a 1 1/4-inch thick, 6-inch circle. [I totally shaped this by hand. Shh.] Cut circle into 6 wedges. Transfer them to a baking sheet that has either been buttered or lined with a fresh sheet of parchment paper. Leave at least 2 inches between each scone.
Beat remaining egg in a small bowl with a pinch of salt. Brush the scones with egg wash and sprinkle them with remaining tablespoon of sugar. Bake until firm and golden, about 30 minutes. With a spatula, lift them to a wire rack to cool for 10 minutes.


Easy Breakfast Potatoes
Ingredients:
3 russet potatoes
9 cloves of garlic
1 medium yellow onion
rosemary (LOTS of rosemary. I used 3 or 4 big sprigs from my fire escape rosemary plant.)
salt & pepper
drizzle of olive oil
Directions:
[Since you're already making the scones, I assume that your oven is already preheated to 375. If it's not, do that now.] Cut the potatoes and onion into 1" chunks, and toss with the rest of the ingredients. Leave the garlic cloves whole (trust me), but just remove the little foot-y guy at the bottom. Bake for 45 minutes to an hour, tossing every 20 minutes or so.

Scramble some eggs, cook up some sausage if your guests happen to be the kind of folks who don't consider a meal a meal unless they've got meat on their plate, brew a pot of coffee, put on some music, and you've got an easy & delicious brunch. No swearing required.

Thursday
Oct142010

Mexichocotofu Pudding

Kablow! Just when you thought the recipe goodness was done for the day, here I am giving you dessert. And holy cow, what a dessert it is.

When I was at the end of my pregnancy, Elisabeth served me a chocolate tofu pie, which I proceeded to devour all in one sitting. I spent the rest of my pregnancy craving it at all times of the day, and to be quite honest, I still do. I make do with this recipe, although I bet it would be awesome in a graham cracker crust laced with candied ginger. I take absolutely no credit for this recipe at all--it's all Bittman. Because I try to use as little refined sugar as possible, I replaced the sugar with agave nectar, though you can use honey or maple syrup as well.

Mexican Chocolate Tofu Pudding

Ingredients:
1/2 cup agave nectar, maple syrup, or honey
1 pound silken tofu
8 ounces high-quality chocolate, melted (I used Green & Black's Organic 70% Dark Chocolate)
1 teaspoon vanilla extract
1 1/2 teaspoons ground cinnamon
1 teaspoon chili powder, or more to taste

Directions:

Put everything in your blender, and puree it until smooth. Divide it between 6-8 ramekins or glasses, and chill. Don't fight the urge to go, "mmmmmmmmmmmm" the whole time you're eating it. Everyone else around you will be doing the same thing.
Enjoy, friends! Have a wonderful Thursday! 


Thursday
Oct142010

Roasted Vegetable Enchiladas

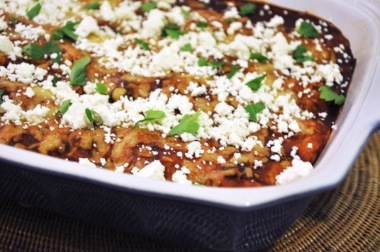
These enchiladas aren't made from an authentic family recipe passed down through generations and the final product isn't necessarily photogenic, but this is definitely one of our favorite meals. Enchiladas are warm and cozy and versatile enough to be stuffed with just about anything taking residence in your produce drawer (or your meat drawer, if that's your thing). If, like me, you love stocking your freezer with homemade goodness for those nights when cooking a real meal is just too daunting, then this is the meal for you. These taste just as yummy when pulled from the freezer as they do when eaten the night you prepared them. Martha freezes her enchiladas this way, but I've always frozen ours smothered in sauce without a problem, so you may want to save yourself a step. 

Don't be overwhelmed by all the components of this meal because there are plenty of ways to multitask while you're cooking. You can easily end up with a few extra dinners with barely any additional effort. For instance, when you roast the vegetables, make extra to add to salads or pasta. Freeze half the enchiladas for another night or just freeze half the sauce to make it easier to throw these together on a weeknight. They're worth the effort.

Enchilada Sauce
Ingredients:
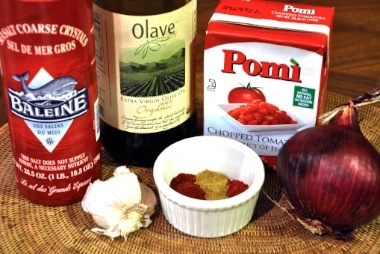
2 tablespoons olive oil
2 teaspoons cumin
2 teaspoon chili powder
1 teaspoon smoked paprika
5 cloves garlic, crushed or chopped
1 medium red onion, chopped
26.5 oz box of chopped tomatoes, with most of the liquid drained
2-3 chipotle peppers in adobo sauce
salt and pepper to taste

Directions:
Coat the bottom of a medium sized saucepan with olive oil and heat on medium. Add the cumin, chili powder, smoked paprika, and garlic and stir until fragrant. Add the onion and cook until translucent. Stir in the tomatoes and chipotle peppers. Bring to a boil. Reduce heat and let the mixture simmer until it reduces slightly (about five minutes). Remove from heat and let the sauce cool slightly. Puree with an immersion blender (or a regular blender) and add salt and pepper to taste.

Roasted Vegetable Enchiladas

Ingredients:
4 tablespoons olive oil
2 cups sliced cremini mushrooms
1 yellow onion, chopped in 1/2 inch pieces
2 medium sweet potatoes (or winter squash), chopped in 1/2 inch cubes
2 cups baby spinach, wilted with water squeezed out (one 10 oz box of frozen spinach, thawed with water squeezed out is fine)
1 cup cottage cheese
1/2 cup goat cheese
1 1/2 cups black beans, mashed with garlic powder, salt, and pepper to taste (these are the tastiest, but you can substitute canned, if necessary)
12 small corn tortillas
1 cup grated monterey jack cheese


Directions:
Preheat the oven to 450 degrees. Toss the cremini mushrooms and onion with enough olive oil to lightly coat and spread in a single layer on one cookie sheet. Toss the sweet potatoes or squash with enough olive oil to lightly coat and spread in a single layer on a second cookie sheet. Roast the mushrooms and onion for about 15 minutes, until the bottoms are golden brown. Roast the sweet potatoes or squash for about 30 minutes, tossing halfway through (when you remove the mushrooms and onions). Toss the vegetables together and set aside. Reduce oven temperature to 375 degrees.

Puree the spinach, cottage cheese, and goat cheese in a blender or with an immersion blender. Add salt and pepper to taste.

Now you're ready to assemble the enchiladas. Coat the bottom of a 9x12 inch baking pan with a thin layer of enchilada sauce (you can also use two 8 inch square baking pans, if you want to bake one and freeze one for later). Wrap your stack of tortillas loosely in a cloth napkin or towel and heat for about 30 seconds in the microwave to soften. Take one tortilla and spread with a thin layer of beans. Add a layer of vegetables, and top with two spoonfuls of the spinach cheese mixture. Roll tightly and place seam side down in the prepared baking dish. Do the same with the remaining tortillas. 

When they are all assembled, top with enchilada sauce, making sure the ends of the tortillas are completely covered (or they get too crispy). Sprinkle with grated cheese. Bake for about 20 minutes, or until the sauce looks bubbly. 

Top with additional cheese, sour cream, or guacamole.

Guacamole
Please make your own guacamole, I implore you. It pains me anytime I see someone defrost guacamole and squeeze it out of a bag. If you're truly pressed for time, mash the avocados with lime juice, salt and pepper, and then stir in fresh salsa. Everything is already chopped for you if you use salsa, so there is really no excuse.
Ingredients:
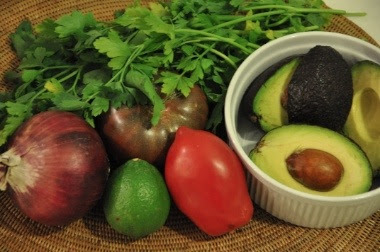
2 ripe avocadoes, cut in half and pitted
2 limes, juiced
salt and pepper to taste
1 small tomato, seeded and cut into a 1/4 inch dice
1/8 cup red onion, finely chopped
1/3 cup cilantro, coarsely chopped

Directions:
Scoop the avocado flesh into a medium sized bowl. Add the juice of two limes and salt and pepper to taste. Mash the avocado with a fork until only small lumps remain. Stir in tomato, onion, and cilantro.

Do you know the trick to saving guacamole without it turning brown? Just smoosh a piece of saran wrap directly into the top layer.

If I weren't pregnant, I'd insist this Mexican feast be enjoyed with a frosty margarita. Since I am, I can say with authority that it's still quite yummy accompanied by sparkling water with lime. Whatever your beverage of choice, happy eating!